If you’re hosting a web server, game server, or application on your Windows Server VPS, you may need to open and forward specific ports in the Windows Defender Firewall to allow incoming traffic. This guide will show you how to open and forward ports in Windows Server Firewall.
📌 Prerequisites
-
A Windows Server VPS from VolticHost
-
Administrator access
-
The port number you need to open (e.g.,
25565for Minecraft,8080for a web server)
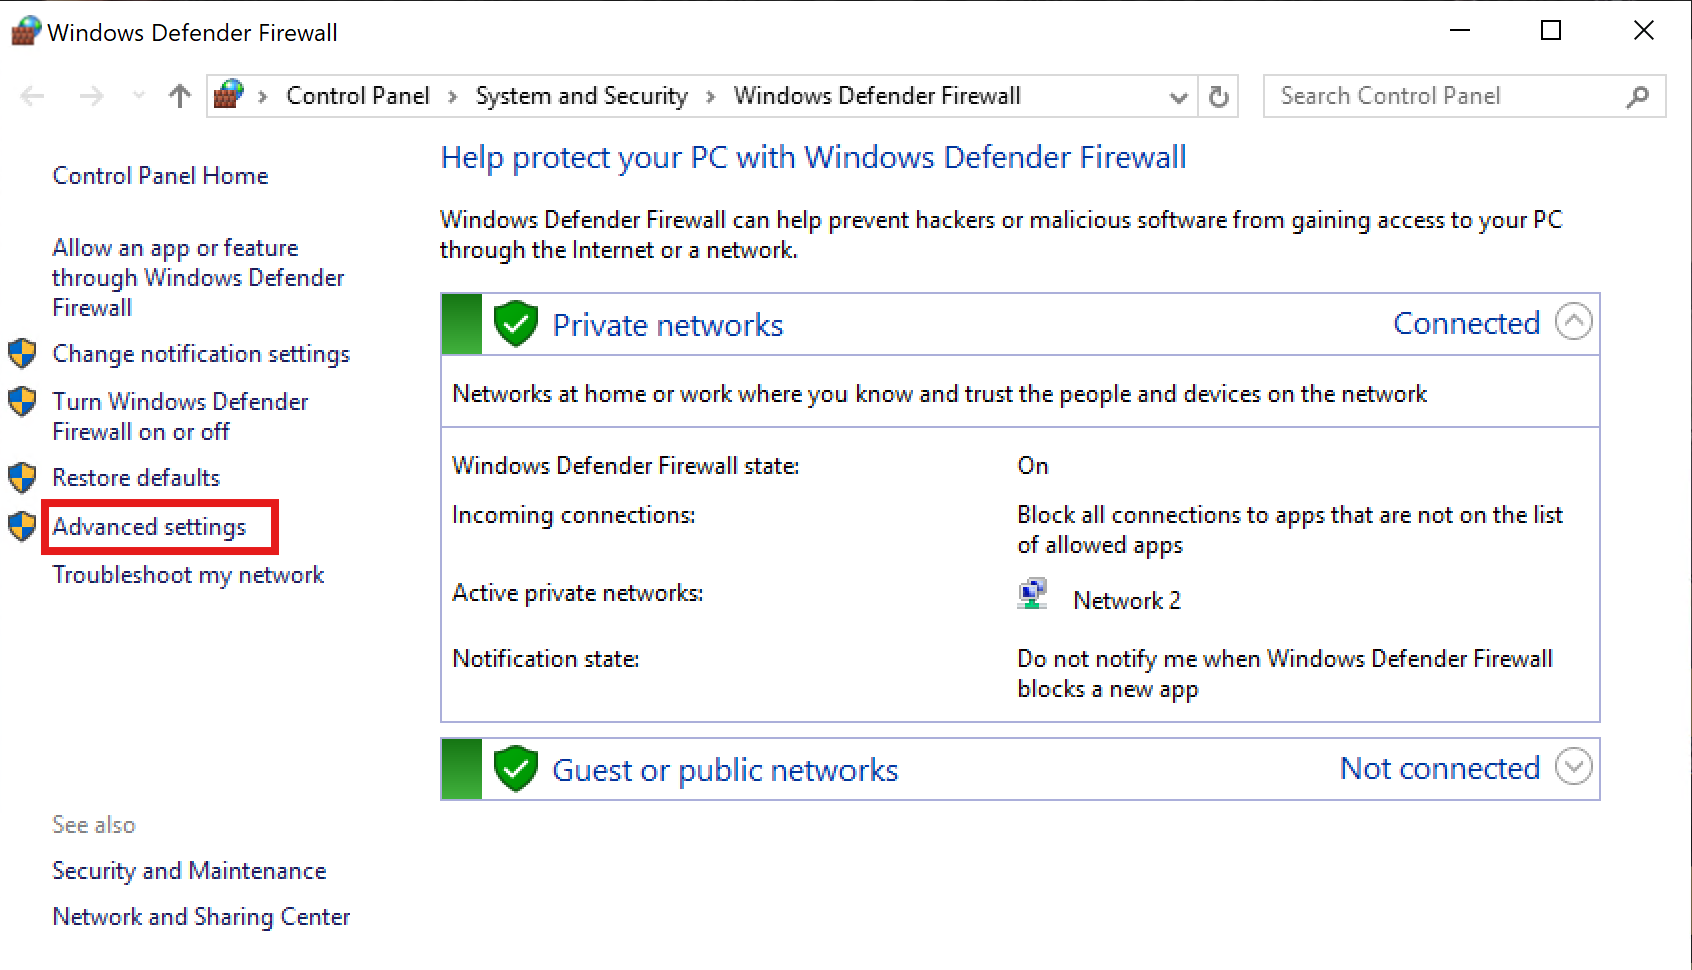
1️⃣ Open Windows Defender Firewall
-
Click Start, search for Windows Defender Firewall, and open it.
-
In the left panel, click Advanced settings.
-
You’ll see the Windows Firewall with Advanced Security window.
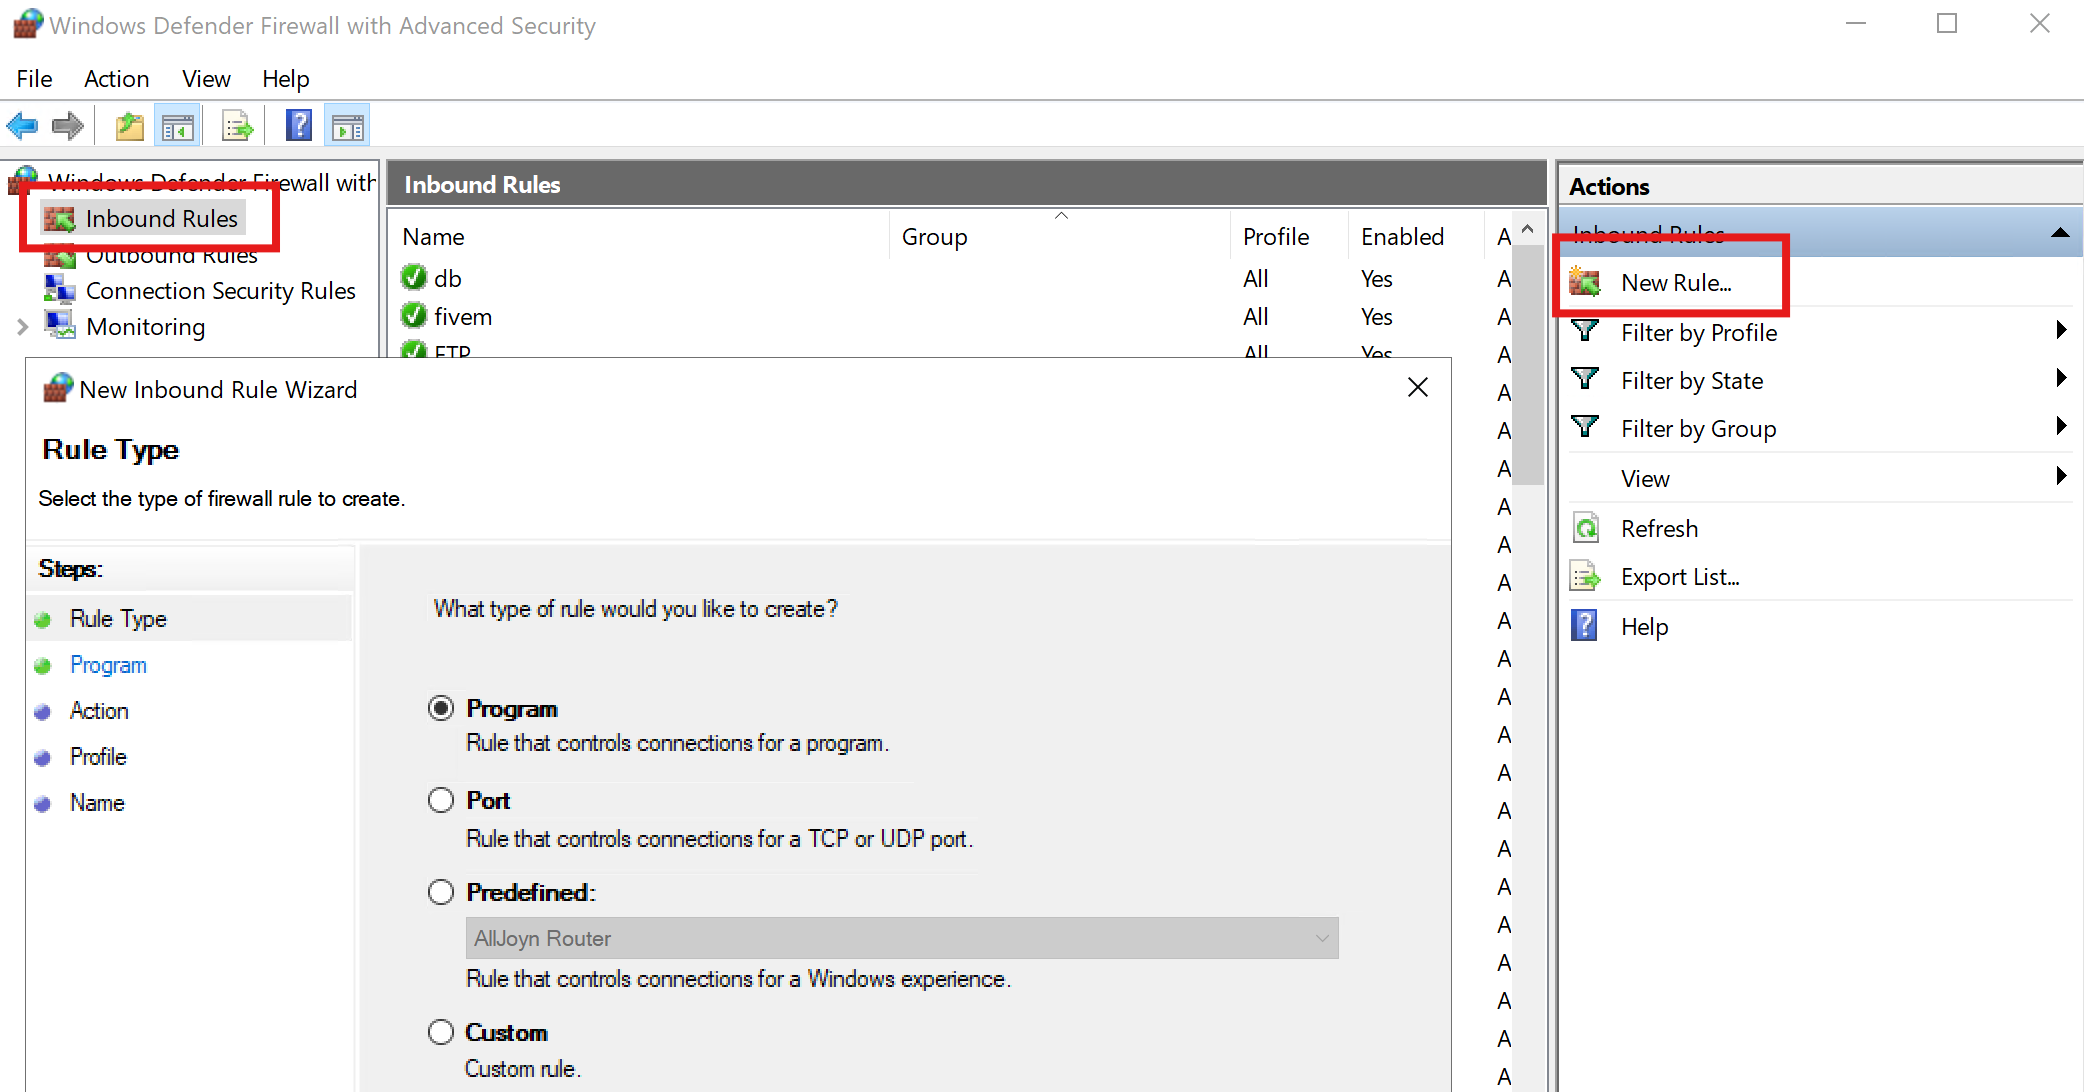
2️⃣ Create a New Inbound Rule (Allow Incoming Traffic)
-
In the left panel, select Inbound Rules.
-
Click New Rule… (right panel).
-
In the Rule Type window, select Port and click Next.
-
Choose TCP or UDP (based on your application’s requirement).
-
Under Specific local ports, enter the port number you need to open (e.g.,
25565for Minecraft). -
Click Next, then select Allow the connection.
-
Click Next, ensure all network types (Domain, Private, Public) are checked, and click Next again.
-
Name your rule (e.g., Minecraft Server Port) and click Finish.
✅ Your port is now open for incoming traffic.
3️⃣ Create an Outbound Rule (Allow Outgoing Traffic)
To allow your server to send data through the port, repeat the process for Outbound Rules:
-
In Windows Defender Firewall with Advanced Security, select Outbound Rules (left panel).
-
Click New Rule… (right panel).
-
Select Port, then click Next.
-
Choose TCP or UDP, and enter the same port number.
-
Click Next, select Allow the connection, and click Next again.
-
Ensure all network types (Domain, Private, Public) are checked.
-
Name your rule (e.g., Minecraft Outbound Port) and click Finish.
✅ Your application can now send data through this port.
4️⃣ Verify That the Port is Open
To ensure the port is open, use Command Prompt (cmd):
Run the following command:
netstat -an | find "25565"
(Replace 25565 with your actual port.)
If the port is open, you’ll see an entry like this:
TCP 0.0.0.0:25565 0.0.0.0:0 LISTENING
Alternatively, you can use an online port checker like: https://www.yougetsignal.com/tools/open-ports/
Enter your VPS IP address and the port number to verify.
5️⃣ (Optional) Port Forwarding via NAT (For Internal Networks)
If you need to forward a port from your VPS internal network to an external network, follow these steps:
-
Open Command Prompt (Admin) and run:
netsh interface portproxy add v4tov4 listenport=8080 listenaddress=0.0.0.0 connectport=80 connectaddress=127.0.0.1-
Replace
8080with the external port. -
Replace
80with the internal port. -
Replace
127.0.0.1with the internal IP of your hosted service.
-
-
To verify the forwarding rule:
netsh interface portproxy show all -
To remove a forwarding rule:
netsh interface portproxy delete v4tov4 listenport=8080 listenaddress=0.0.0.0
✅ This method allows port redirection within your VPS for better security and access control.
🎉 Conclusion
You’ve successfully opened and forwarded ports in Windows Defender Firewall, allowing external connections to your applications. If you experience issues, double-check your firewall settings and ensure your server is listening on the correct port.
For further assistance, contact Voltichost Support.